Docs
Personal Cloud Server Project: Nextcloud AIO, DuckDNS, and WordPress Hosting – CLAUDE Reply
Cleanup done — hello-world container/image gone, the stray file removed, Portainer container and its data volume both removed. Docker now shows just the Nextcloud AIO stack.
Now let’s set up Tailscale — this is what lets you (and your phone/laptop) reach the server securely from anywhere, without ever opening an SSH port on your router to the whole internet.
What it is, in plain terms: Tailscale creates a private network between your devices (like a permanent, automatic VPN) using your own login (Google/Microsoft/GitHub/Apple/email — whichever you prefer). Once installed, the server gets a private address that only your logged-in devices can reach. Nobody scanning the internet can even see it exists.
Let’s install it.
Ran 1 shell command
Tailscale is installed. Now I need to start it and get a login link for you to open — this is the one step that needs your account, so it has to happen in your browser.
Ran 2 shell commands
Here’s your login link:
What to do: Open that link in a browser on your Windows machine (or your phone — doesn’t matter which, it just needs to be a device where you can log in). Tailscale will ask you to sign in — pick whichever option you like (Google, Microsoft, GitHub, Apple, or email). This creates your free Tailscale account and links this server to it.
Important: whatever account you choose here is the one you’ll also install Tailscale under on your phone and Windows machine afterward, so all your devices can see each other. Pick one you’ll remember and keep using for this project.
Once you’ve logged in and see a confirmation page, let me know and I’ll verify the server joined your network.
※ recap: We’re setting up your Nextcloud server securely with Tailscale for remote access. Next: open the login link I sent, sign in with any account, and let me know once you see the confirmation page. (disable recaps in /config)
10 tasks (2 done, 1 in progress, 7 open)
◼ Install and configure Tailscale for remote admin access
◻ Harden SSH daemon config
◻ Configure UFW firewall
◻ Automate DuckDNS IP updates via systemd timer
◻ Install Nginx Proxy Manager as reverse proxy in front of A…
Next, add a second device.
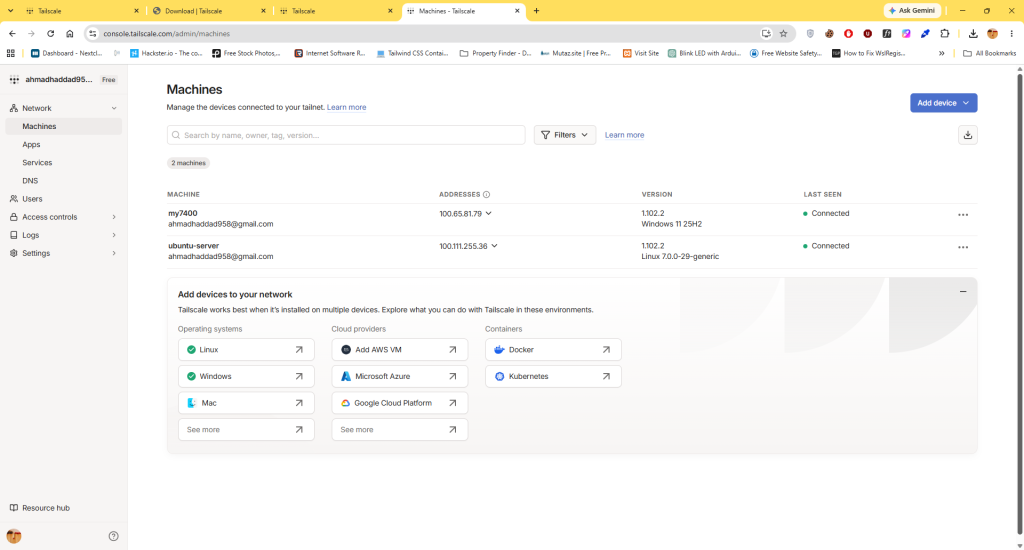
Your device (ubuntu-server) was added to your network!
Tailscale connects multiple devices together, so you’ll need it installed on more than one device. Open the link below on a second device and download Tailscale there too.LinuxWindowsmacOSiPhone & iPadAndroidSynology
Download Tailscale from our website, send yourself an email with a download link, or read our installation guide.
Cleanup done — hello-world container/image gone, the stray file removed, Portainer container and its data volume both removed. Docker now shows just the Nextcloud AIO stack.
Now let’s set up Tailscale — this is what lets you (and your phone/laptop) reach the server securely from anywhere, without ever opening an SSH port on your router to the whole internet.
What it is, in plain terms: Tailscale creates a private network between your devices (like a permanent, automatic VPN) using your own login (Google/Microsoft/GitHub/Apple/email — whichever you prefer). Once installed, the server gets a private address that only your logged-in devices can reach. Nobody scanning the internet can even see it exists.
Let’s install it.
Ran 1 shell command
Tailscale is installed. Now I need to start it and get a login link for you to open — this is the one step that needs your account, so it has to happen in your browser.
Ran 2 shell commands
Here’s your login link:
What to do: Open that link in a browser on your Windows machine (or your phone — doesn’t matter which, it just needs to be a device where you can log in). Tailscale will ask you to sign in — pick whichever option you like (Google, Microsoft, GitHub, Apple, or email). This creates your free Tailscale account and links this server to it.
Important: whatever account you choose here is the one you’ll also install Tailscale under on your phone and Windows machine afterward, so all your devices can see each other. Pick one you’ll remember and keep using for this project.
Once you’ve logged in and see a confirmation page, let me know and I’ll verify the server joined your network.
✻ Baked for 1m 21s · 1 shell still running
※ recap: We’re setting up your Nextcloud server securely with Tailscale for remote access. Next: open the login link I sent, sign in with any account, and let me know once you see the confirmation page. (disable recaps in /config)
● Background command “Start Tailscale and generate a login link” completed (exit code 0)
Ran 1 shell command
Tailscale is connected — the server now has a private Tailscale IP: 100.111.255.36, tied to your account.
Now let’s get your Windows machine on the same private network so you can actually use it.
Step 1 — Install Tailscale on Windows:
Go to https://tailscale.com/download/windows, download and run the installer, then sign in — use the exact same account you just used for the server (so both devices land on the same private network).
Step 2 — Test it:
Once Tailscale shows “Connected” on Windows, open a new terminal window and try:
ssh ahmad@100.111.255.36
This should log you in exactly like your normal SSH does now, but over the private Tailscale network instead of your LAN/router.
Let me know once that works — then we lock down SSH so it’s only reachable this way (no more direct-internet exposure via those 2222/16000 router forwards).
✻ Brewed for 19s
❯ got tailscale installed on my windows 11 pc (this machine i am at now) it is asking me to either open local settings or open admin console or close. which one i need to do?
Neither is required right now — you can safely click Close. Quick explainer so you’re not left wondering:
- Admin console opens a webpage (Tailscale’s dashboard) where you can see/manage all your devices. Handy later, not needed now.
- Local settings opens this device’s own Tailscale preferences (things like whether it starts on boot). Also not needed right now.
Click Close, then look for the Tailscale icon in your Windows system tray (bottom-right, near the clock — might be hidden under the little up-arrow “show hidden icons”). Click it and confirm it says Connected.
Once you see that, open a terminal (PowerShell/Windows Terminal — a new window, separate from wherever you’re chatting with me) and run:
ssh ahmad@100.111.255.36
Let me know if it logs you in.
after installing Tailscale onmy windows machine, i ran this command in the powershell:
PS C:\WINDOWS\system32> ssh ahmad@100.111.255.36
The authenticity of host ‘100.111.255.36 (100.111.255.36)’ can’t be established.
ED25519 key fingerprint is SHA256:WdlP1s8Qd+ulZURsIhu3CJSeQ5gaB3s6AitTln2v4qg.
This host key is known by the following other names/addresses:
C:\Users\ahmad/.ssh/known_hosts:2: 192.168.100.13
Are you sure you want to continue connecting (yes/no/[fingerprint])? yes
Warning: Permanently added ‘100.111.255.36’ (ED25519) to the list of known hosts.
Connection closed by 100.111.255.36 port 22
PS C:\WINDOWS\system32>
SSH over Tailscale is fully working — you’re in. That’s the private, secure path locked down.
Read 1 file
Since there’s no SSH key set up yet, and password auth is what’s actually been under attack, we need to set up key-based login before I turn password auth off — otherwise a mistake could lock you out entirely.
Step 1 — Generate a key pair on your Windows machine. In the same PowerShell window (the one you’re SSH’d from, or open a fresh one — doesn’t matter which), run:
ssh-keygen -t ed25519 -C “ahmad-windows-pc”
It’ll ask two things:
- “Enter file in which to save the key” — just press Enter to accept the default.
- “Enter passphrase” — you can press Enter twice for no passphrase (simplest, fine for a personal machine), or type one if you want extra protection on the key file itself. Your call — either is fine, no passphrase just means anyone who gets your Windows login could use the key.
Step 2 — Show me the public key (this half is safe to share — it’s not a secret, unlike the private half):
type $env:USERPROFILE.ssh\id_ed25519.pub
Paste the full line it prints back here (it’ll start with ssh-ed25519 AAAA…).
Important: never paste the other file (id_ed25519, no .pub) anywhere — that one’s the private key and must stay only on your Windows machine.
Go ahead and run those two commands.
Nginx Account:
Full Name: Ahmad Elhaddad
Email address: ahmadhaddad958@gmail.com
password: ent-Z1M5
Initial Nextcloud username: admin
Initial Nextcloud password: a7dd1672a237101fe5fa68316eb5620d201b97f5719465ca
initial passphrase: postage spotlight unsolved staleness disk dexterous riverside passerby
Best tools to use for copying media files in bulk byt fast and safe
before we start WP. i need you advice about the best fast tools to use for bulk copying from my repository media to this 1.8TB dedicated to Nexcloud (of course not bypassing nextcloud, but with coordination with nextcloud to make sure every media is registerd indexed etc. i tired in the old setting Robocopy, it was great fast but fills the log too quickly and caused hanging the entire setup. i tried rclone, was a bit slower but no problems with the loggin….but then caused corruption to the entire setup….the problem, using natively the nextcloud to move the media takes days….i have more that 700GB worth of media on one drive and about 400+ GB on another drive….it is going to be christmas before finishing the download 🙂
───────────────────────────── 1 new message ──────────────────────────────
Good instinct to ask before diving in — the tool matters less here than the workflow, and I think I can explain why rclone likely corrupted things so we avoid repeating it.
Why the past attempts went wrong, most likely:
- Robocopy logging to death: that’s a Windows/SMB-network-copy symptom — verbose per-file logging over a network share can balloon and choke the transfer. Not relevant once we’re copying directly on Linux.
- rclone corruption: almost certainly caused by copying live into Nextcloud’s data directory while Nextcloud itself was running — its background jobs (file scanning, thumbnail generation, cron) were reading/interpreting a partially-written tree at the same time files were still landing, and Nextcloud’s database (which tracks every file’s state) got out of sync with what was actually on disk. That mismatch is what corruption in Nextcloud almost always actually is — not damaged files, but a database that disagrees with the filesystem.
The correct pattern for exactly this (bulk import, not upload):
- Put Nextcloud in maintenance mode first (occ maintenance:mode –on) — this stops every background process from touching the filesystem while we’re actively writing to it. No race conditions possible.
- Copy files directly onto disk with rsync, not through Nextcloud at all (not WebDAV, not the sync client — those are what make native uploads take days, since each file goes through chunking, versioning checks, and a database transaction). rsync -a –info=progress2 –partial gives one continuously-updating progress line instead of a log per file, and –partial means if it’s interrupted, it resumes instead of restarting.
- Fix ownership afterward (chown -R www-data:www-data on what was copied) so Nextcloud’s own process can read/manage it.
- Take Nextcloud out of maintenance mode, then run occ files:scan — this is the official, supported way to tell Nextcloud “go index everything that’s now on disk.” It’s fast (metadata operations, not re-copying), and this is the step that makes your media actually show up, searchable and shareable, in Nextcloud.
This sidesteps both failure modes entirely — nothing running concurrently to get confused, and no fragile network-share logging.
One thing that changes my answer: are those two source drives (700GB / 400GB+) things you can physically plug into this Ubuntu server directly (USB or SATA), even temporarily? If so, we skip the network entirely and do a local disk-to-disk copy, which will be both the fastest and the most reliable option — no Windows/SMB/Tailscale transfer layer involved at all.
One thing that changes my answer: are those two source drives (700GB / 400GB+) things you can physically plug into this Ubuntu server directly (USB or SATA), even temporarily? If so, we skip the network entirely and do a local disk-to-disk copy, which will be both the fastest and the most reliable option — no Windows/SMB/Tailscale transfer layer involved at all.
Got it — network transfer it is. Given they’re staying reliable and low-effort matters more than shaving off the last bit of raw speed, here’s what I’d actually recommend, and why it avoids repeating both past failures:
Recommended: rsync via WSL on your Windows machine, over the SSH connection we already built.
Why this specific combination:
- No new services on the server — it rides on the SSH/Tailscale access already set up and hardened. No Samba, no new firewall rules, no new attack surface for a one-time job.
- rsync is resumable and checksums as it goes — if it gets interrupted 600GB in, it picks back up rather than starting over, and it won’t silently leave things half-written the way the rclone incident did.
- Controlled, sane logging — one rolling progress line, not a log file that grows until something chokes (that was robocopy’s actual problem, not the copying itself).
The setup on your end:
- Do you already have WSL (Windows Subsystem for Linux) installed? If not, it’s one command in an admin PowerShell (wsl –install), but it requires a reboot to finish — wanted to check before I have you kick that off, since it’s a real interruption to your machine, not something to do mid-task by accident.
- Once WSL’s up, we install rsync inside it (one line), and it can already see your Windows drives (D:, E:, wherever the media lives) automatically.
- From there, rsync talks straight to the server using your existing SSH key — no new credentials, nothing new to secure.
If you’d rather skip WSL entirely, the fallback is a GUI tool like WinSCP using the same SSH key — simpler to click through, somewhat less robust for a 1TB+ resumable transfer, but zero setup beyond installing it.
Which way do you want to go — WSL+rsync (a bit more setup, most reliable), or WinSCP (quick to start, simpler)?
Good context — since these will stay as ongoing (mostly-read-only) backups, that also means this won’t be a strict one-time job; you’ll likely want to sync new additions occasionally too. That’s another point in rsync’s favor — reruns only transfer what’s new/changed, not the whole library again.
So, back to the fork: do you already have WSL installed on Windows, or would you rather go the simpler WinSCP route (quicker to start, no reboot needed, a bit less robust for resuming a huge interrupted transfer)?
So, back to the fork: do you already have WSL installed on Windows, or would you rather go the simpler WinSCP route (quicker to start, no reboot needed, a bit less robust for resuming a huge interrupted transfer)? I do, but i used it once for a small project and then never touched it. so what do yo suggest?
Good — no reboot needed then. Let’s use WSL. Since it also fits how you’ll use this going forward (occasional syncs of new files, not just once), it’s worth the extra setup.
Step 1 — Open WSL. Search “WSL” in your Start menu (or open a PowerShell/Terminal window and type wsl, Enter). You should land on a prompt that looks different from PowerShell — something like ahmad@YOURPC:~$.
Step 2 — Install rsync inside it:
sudo apt update && sudo apt install -y rsync
(It’ll ask for the password of whatever Linux user you set up when you first used WSL — not your Windows password.)
Step 3 — Generate a fresh SSH key, specifically inside WSL (not reusing the Windows one — WSL’s filesystem permissions on Windows-mounted drives are too loose for SSH’s liking, so a separate key avoids a whole class of annoying errors):
ssh-keygen -t ed25519 -C “ahmad-wsl”
Enter for the default location, Enter twice for no passphrase (same as before).
Step 4 — Show me the public key:
cat ~/.ssh/id_ed25519.pub
Paste that line back here and I’ll authorize it on the server — then we’ll test the connection and go find your media drives from inside WSL.
Fixed — ahmad is now in the www-data group, and the target directory allows group writes (with new subfolders automatically inheriting the right group going forward, so this won’t need repeating). Since it’s a fresh permission set, try the same command again from WSL:
rsync -a –info=progress2 –partial -e ssh “/mnt/e/Family & Friends/Ajam-000-Wafiq+Fatma” ahmad@100.111.255.36:/mnt/nextcloud_data/admin/files/
✻ Cooked for 29s
❯ ahmad@my7400:/mnt/c/WINDOWS/system32$ rsync -a –info=progress2 –partial -e ssh “/mnt/e/Family & Friends/Ajam-000-Wafiq+Fatma” ahmad@100.111.255.36:/mnt/nextcloud_data/admin/files/
523,627,223 100% 10.33MB/s 0:00:48 (xfr#79, to-chk=0/81)
ahmad@my7400:/mnt/c/WINDOWS/system32$
Transferred cleanly — 523MB in 48 seconds (~10MB/s, reasonable over WiFi/LAN through SSH encryption). Let’s verify what actually landed and get it registered in Nextcloud.
Ran 1 shell command
Small miss on my end — that needs sudo since regular users can’t reassign file ownership. Let me redo that and move on to registering it with Nextcloud.
Ran 1 shell command
One structural thing to fix first: since your source top-level folder is Family & Friends, everything should probably nest under a matching folder in Nextcloud too — otherwise this test folder ends up sitting loose at the top level while everything else lands one level deeper. Let me fix that now before we scale up, and confirm Nextcloud’s database follows correctly.
Ran 1 shell command
Same issue as before — my own shell session predates the group change, so it doesn’t see it either. Let me just use sudo directly:
Ran 1 shell command
Confirmed — database now correctly shows it nested under Family & Friends, with the old path cleanly removed. That pipeline (rsync → permissions → scan) is proven end to end. Go check https://ahaddad.duckdns.org in a browser if you want to see Family & Friends/Ajam-000-Wafiq+Fatma show up for real.
Now, the actual scale reality: at the ~10MB/s we just measured, 700GB works out to roughly 18-20 hours of continuous transfer (likely more once it hits the huge folders full of tiny phone-dump photos — lots of small files are slower per-GB than a few large ones). That’s the honest number, not something a different tool would meaningfully change — it’s governed by your network/disk speed, not rsync vs. rclone vs. robocopy.
Good news on the coordination side: we don’t need to lock Nextcloud in maintenance mode for that whole stretch. Nextcloud’s own background jobs only act on files it already knows about — it won’t go poking at content sitting unscanned on disk. We just need to keep doing what we did here: copy first, then scan afterward, never scan mid-copy. So Nextcloud stays fully usable for you the entire time this runs in the background.
Two practical things before you kick off the real one:
- Stop this Dell desktop from sleeping during the transfer — Windows Settings → System → Power → set “Screen and sleep” to Never (at least “sleep,” screen-off is fine) for the duration. If it sleeps mid-transfer, the connection drops (recoverable with –partial, but no reason to invite the interruption).
- Run it from WSL as one job covering everything left in Family & Friends (rsync will skip the folder we already did, it won’t recopy it):
rsync -a –info=progress2 –partial -e ssh “/mnt/e/Family & Friends/” “ahmad@100.111.255.36:/mnt/nextcloud_data/admin/files/Family & Friends/”
Kick it off whenever you’re ready — it’ll run for many hours, so this is a “start it before bed” kind of job. Let me know once it’s running (or if it errors early), and I’ll check in on progress from the server side periodically.
✻ Sautéed for 2m 7s
❯ yes family & friends shows us very beautifully…
Great to hear. Whenever you’re ready, go ahead and kick off the full transfer — just double check Windows sleep is disabled first, then run:
rsync -a –info=progress2 –partial -e ssh “/mnt/e/Family & Friends/” “ahmad@100.111.255.36:/mnt/nextcloud_data/admin/files/Family & Friends/”
It’ll sit there showing a rolling progress line for many hours — that’s normal, not stuck. Once it’s going, let me know and I’ll periodically check progress from the server side without you needing to babysit it. When it’s fully done (or if you want to stop and resume later), just tell me and I’ll run the chown + occ files:scan pass to register everything with Nextcloud.
✻ Worked for 6s
❯ then for tomorrow from work, i need to setup claude also in the powershell like to day. can you write something so that i paste it to you to start tomorrow installing the Tailscale and whatever needed to ssh the ubuntu server?
Here’s a self-contained prompt you can paste into a fresh Claude Code session tomorrow (whether that’s on the work PC or anywhere else). I’ve written it so a Claude instance with zero memory of this conversation can pick up correctly:
I have a home Ubuntu server (“ubuntu-server”, Ubuntu 26.04 LTS) running Nextcloud AIO behind Nginx Proxy Manager, publicly reachable at https://ahaddad.duckdns.org. Remote administration is done exclusively via Tailscale — no SSH is exposed to the internet, and SSH password authentication is disabled server-side (key-only). The server’s Tailscale IP is 100.111.255.36, SSH user is ahmad.
I’m now on a different Windows machine and need to set up remote access matching my other devices. Please help me:
- Install Tailscale on this machine and log into the same Tailscale account I already use on my other devices.
- Generate a new SSH key pair specifically for this machine (ed25519), labeled something like “ahmad-work-pc”.
- Show me the resulting public key.
Note: this machine won’t have direct access to the server’s filesystem to authorize the new key itself — I’ll need to take the public key you show me and get it added to /home/ahmad/.ssh/authorized_keys on the server through a device/session that already has access.
One important note on that last step: since a brand-new session can’t add its own key to the server, you’ll need to bring that public key back to a place that can — either paste it into this conversation if you’re able to reopen it from work, or into any other device/session that already has working SSH access to the server (this Windows PC or the WSL environment both qualify, since they can sudo and directly edit that file).
Separately, I’m saving a memory of this project’s architecture now so that even without you pasting anything, any future Claude Code session I run will already have the key facts (Tailscale-only access, no exposed SSH, NPM reverse proxy setup, external-drive datadir, etc.) — that should make picking this up later, from any machine, considerably smoother.
Recalled 1 memory, wrote 2 memories
Memory saved — that project summary will now surface automatically in future Claude Code sessions on this machine, even without you pasting anything.
To recap where things stand: the paste-able prompt above is ready for tomorrow, and once you kick off that big rsync for the rest of Family & Friends tonight (with Windows sleep disabled), it can run unattended for the many hours it’ll take. Good stopping point for today — WordPress planning (task #10) is still waiting whenever you want to pick it up next.
The Complete md setup-guide
Runbook · ahaddad home server
From bare metal to three hosted services
A reproducible build order for the box currently running Nextcloud and a small family of WordPress sites — Tailscale-only administration, one reverse proxy, one external drive for data. Skips the dead ends; keeps only what’s actually running.Contents
- Base OS & access
- Storage
- Docker & Nextcloud AIO
- Reverse proxy & public access
- Adding client devices
- Bulk media import
- WordPress hosting
- Full system map
- Appendix
ubuntu-server · 100.111.255.36InternetRouterforwards 80/443 only80 / 443Nginx Proxy Mgr:80 / :443, TLS terminationforwardedNextcloud Apache127.0.0.1:1100WordPress sitesrouted by pathby domainby pathTailscale deviceslaptop · phone · WSL · …SSH :22 · NPM admin :81 · AIO :8080/8443bound to the Tailscale IP onlyencrypted, direct — never touches the routerpublic pathtailnet-only pathTwo independent paths into the box. Public HTTP/HTTPS is the only thing the router forwards, and Nginx Proxy Manager is the only thing that ever receives it — it alone decides whether a request goes to Nextcloud or a WordPress site. Every administrative surface (SSH, NPM’s own admin UI, the AIO admin panel) is bound to the Tailscale interface specifically, so it’s reachable only from devices already on the tailnet, from anywhere in the world, without ever being exposed to the router.
01
Base OS & access
Everything else assumes key-only SSH and a private admin channel exist before any service goes on the box.
Install Ubuntu Server
Standard install (this box runs 26.04 LTS). Use the installer’s LVM-free/plain ext4 layout on the boot disk, create the primary user during setup, and skip any bundled snap extras you don’t need.
Lock SSH to key-only
Add your public key to ~/.ssh/authorized_keys during first login (cloud-init images often force password auth on until you turn it off), then override it explicitly:
# /etc/ssh/sshd_config.d/10-hardening.conf
PasswordAuthentication no
sudo systemctl reload sshd after confirming key-based login works in a second terminal — don’t close the first one until the second one succeeds.
Install Tailscale on the server
curl -fsSL https://tailscale.com/install.sh | sh
sudo tailscale up
Note the Tailscale IP it’s assigned (100.x.x.x) — every later step that binds an admin port does so against this address specifically, never 0.0.0.0.
Firewall baseline
sudo ufw default deny incoming
sudo ufw default allow outgoing
sudo ufw allow in on tailscale0 comment 'Trust all Tailscale traffic'
sudo ufw allow 41641/udp comment 'Tailscale direct connections'
sudo ufw allow from 192.168.100.0/24 to any port 22 comment 'LAN SSH fallback'
sudo ufw enable
Why
The LAN-subnet SSH rule is a deliberate fallback for the day Tailscale itself is unreachable (router reboot mid-update, etc.) — not a general-purpose hole. It’s scoped to the local subnet, not the internet.
Ports 80/443 get opened in Phase 4, once there’s a reverse proxy actually listening on them.
02
Storage
Application data lives on the external drive; the boot NVMe only ever holds the OS and Docker.
Mount the external drive
Find its UUID with sudo blkid, then add a stable fstab entry:
# /etc/fstab
UUID=<drive-uuid> /mnt/nextcloud_data ext4 defaults,noatime,nofail 0 2
nofail matters — without it, a missing external drive at boot can hang the whole system waiting on the mount.
sudo mkdir -p /mnt/nextcloud_data
sudo mount -a
Group convention for shared write access
The Nextcloud container’s process runs as www-data inside the container, which maps to a real www-data user/group on the host. Add your own user to that group up front, so you can write into Nextcloud-owned directories over SSH later without a permissions fight:
sudo usermod -aG www-data $USER
# log out and back in (or open a fresh SSH session) for it to take effect
Gotcha
Group membership is read at login. A shell session opened before this command won’t see the new group — reconnect rather than trying to refresh it in place.
03
Docker & Nextcloud AIO
One container manages the rest of the Nextcloud stack for you — it just needs to know where the data lives and which ports are safe to expose.
Install Docker Engine
curl -fsSL https://get.docker.com | sh
sudo usermod -aG docker $USER
# reconnect for the group to apply
Run the AIO mastercontainer
This is the one container Nextcloud AIO needs directly — it manages every other Nextcloud container itself via the Docker socket. The two choices that matter: NEXTCLOUD_DATADIR points at the external drive, and the web-admin ports (8080/8443) bind to the Tailscale IP only, never the public interface.
sudo docker run \
  --sig-proxy=false \
  --name nextcloud-aio-mastercontainer \
  --restart always \
  --publish <tailscale-ip>:8080:8080 \
  --publish <tailscale-ip>:8443:8443 \
  --env APACHE_PORT=1100 \
  --env NEXTCLOUD_DATADIR=/mnt/nextcloud_data \
  --volume nextcloud_aio_mastercontainer:/mnt/docker-aio-config \
  --volume /var/run/docker.sock:/var/run/docker.sock:ro \
  nextcloud/all-in-one:latest
APACHE_PORT=1100 matters: it moves the internal Apache container off port 80, freeing that port for the reverse proxy set up in the next phase — Apache stays bound to 127.0.0.1 only and is never reached directly.
Complete setup over Tailscale
From any device on the tailnet, open https://<tailscale-ip>:8443 and follow AIO’s own wizard (it issues itself a self-signed cert for this step — that warning is expected). It will pull and start the rest of the stack: the Nextcloud app container, Postgres, Redis, image processing, Talk, etc.
Install Portainer (Docker management UI)
Same private-admin pattern as everything else — bound to the Tailscale IP only, never public:
# ~/docker/portainer/docker-compose.yml
services:
  portainer:
    image: portainer/portainer-ce:latest
    container_name: portainer
    restart: always
    ports:
      - "<tailscale-ip>:9443:9443"
    volumes:
      - /var/run/docker.sock:/var/run/docker.sock
      - ./data:/data
cd ~/docker/portainer && docker compose up -dGotcha
Portainer locks its own setup screen 5 minutes after first start if no admin account has been created yet (“the instance timed out for security purposes”) — if that happens, docker restart portainer resets the timer.
Recent Portainer versions also require a one-time setup token pasted into the initial admin-creation screen, printed only in the container’s startup logs:
docker logs portainer 2>&1 | grep setup_tokenGrab it and create the admin account promptly — both the token and the 5-minute window are freshly (re)issued on every restart.
04
Reverse proxy & public access
One entry point for the whole internet-facing surface: Nginx Proxy Manager terminates TLS and decides where every request actually goes.
Run Nginx Proxy Manager
On the same Docker network as the Nextcloud containers, so it can reach them by container name:
# ~/docker/npm/docker-compose.yml
services:
  npm:
    image: 'jc21/nginx-proxy-manager:latest'
    container_name: npm
    restart: always
    ports:
      - '80:80'
      - '443:443'
      - '<tailscale-ip>:81:81'
    volumes:
      - ./data:/data
      - ./letsencrypt:/etc/letsencrypt
    networks:
      - nextcloud-aio

networks:
  nextcloud-aio:
    external: true
cd ~/docker/npm && docker compose up -dIts own admin UI (port 81) is bound to the Tailscale IP the same way AIO’s is — the reverse proxy that fronts the public internet is itself only administrable privately.
Dynamic DNS
A free DuckDNS hostname, kept current by a systemd timer rather than cron (survives reboots cleanly, logs to journald):
# ~/duckdns/duck.sh
echo url="https://www.duckdns.org/update?domains=<yourname>&token=<your-token>&ip=" \
  | curl -o ~/duckdns/duck.log -K -
# /etc/systemd/system/duckdns.service
[Unit]
Description=Update DuckDNS IP address
Wants=network-online.target
After=network-online.target
[Service]
Type=oneshot
User=<you>
ExecStart=/home/<you>/duckdns/duck.sh
# /etc/systemd/system/duckdns.timer
[Unit]
Description=Run DuckDNS update every 5 minutes
[Timer]
OnBootSec=1min
OnUnitActiveSec=5min
Persistent=true
[Install]
WantedBy=timers.targetchmod 700 ~/duckdns/duck.sh
sudo systemctl enable --now duckdns.timerOne DuckDNS account can hold several hostnames under the same token — register one now per service you plan to expose (e.g. one for Nextcloud, one as a hub for everything else).
Router port forward
Forward 80 and 443 only, to the server’s LAN IP. Nothing else — SSH stays off the router entirely, reachable only via Tailscale (and the LAN fallback from Phase 1).
Proxy host + certificate
In NPM’s admin UI: Proxy Hosts → Add Proxy Host — domain name, forward to the Nextcloud Apache container on port 1100, then on the SSL tab request a new Let’s Encrypt certificate and force SSL. NPM handles renewal automatically from there.
Open the firewall for real traffic
sudo ufw allow 80/tcp
sudo ufw allow 443/tcp
The full, final rule set looks like this:
| Rule | Purpose |
|---|---|
tailscale0 → allow all | Every private admin surface |
41641/udp → allow | Tailscale direct (NAT-traversed) connections |
22/tcp from LAN subnet → allow | SSH fallback if Tailscale is down |
80/tcp, 443/tcp → allow | Public HTTP/HTTPS, handled entirely by NPM |
| everything else → deny | Default posture |
05
Adding client devices
The same two-step pattern for every new laptop, phone, or WSL environment that needs to administer the box.
- Install Tailscale on the new device, sign into the same tailnet account.
- Generate a device-specific ed25519 key (
ssh-keygen -t ed25519 -C "device-name") — never reuse one key across devices. - Get the new public key onto the server via a device/session that already has access, appended to
~/.ssh/authorized_keys.
Note
A brand-new device can never authorize itself — step 3 always requires bootstrapping from an existing trusted session. There is no password fallback to fall back on once this is set up, by design.
06
Bulk media import
The repeatable recipe for getting a large personal archive onto the Nextcloud data drive without going through the (much slower) WebDAV/web upload path.
Open up write access first
Nextcloud’s own files are owned by www-data with the setgid bit set, so new files created underneath inherit the right group — but pre-existing top-level folders may not have group-write set. Fix the destination folder before copying into it:
sudo chmod g+w "/mnt/nextcloud_data/admin/files/<target folder>"Copy in with rsync, not the web UI
Run from whichever machine actually holds the source files, over SSH to the server:
rsync -a --no-owner --no-group --no-perms --omit-dir-times \
  --partial --info=progress2 \
  --exclude 'Thumbs.db' --exclude 'desktop.ini' \
  --exclude 'System Volume Information' --exclude '$RECYCLE.BIN' \
  -e ssh \
  "/path/to/source/" \
  "user@<tailscale-ip>:/mnt/nextcloud_data/admin/files/<target folder>/"
Why these flags
A non-root SSH user can’t chown/chgrp/set arbitrary timestamps on files it doesn’t own — and some destination folders are pre-existing and owned by www-data, not the connecting user. Skipping ownership/permission/dir-time preservation avoids a wall of harmless-but-noisy errors on every such folder; ownership gets fixed in bulk afterward instead.
It’s safe to re-run the exact same command if a transfer is interrupted — already-copied files are skipped on the size/mtime check, so only the gap gets retried.
Two filesystem limits worth knowing before they surprise you
Gotcha
Unicode normalization. Some sources (old phone exports especially) produce filenames using decomposed Unicode (NFD) — accented/diacritic characters stored as separate combining marks. Nextcloud’s scanner silently refuses to register these (“incompatible encoding”). Fix in bulk with a short walk that renames anything not already in NFC form:
python3 -c "
import os, unicodedata
for dirpath, dirnames, filenames in os.walk('<path>', topdown=False):
    for name in filenames + dirnames:
        nfc = unicodedata.normalize('NFC', name)
        if nfc != name:
            os.rename(os.path.join(dirpath, name), os.path.join(dirpath, nfc))
"
Filename length. ext4 caps individual filenames at 255 bytes, not characters — a long title in a multi-byte script (Arabic, CJK, etc.) can exceed that well before it looks long. Rename to something shorter before copying; there’s no way around the filesystem limit.
Fix ownership, then register with Nextcloud
sudo chown -R www-data:www-data "/mnt/nextcloud_data/admin/files/<target folder>"
docker exec --user www-data nextcloud-aio-nextcloud php occ files:scan \
  --path="admin/files/<target folder>"
Nextcloud never watches the filesystem for out-of-band changes — anything copied in directly is invisible until this scan runs. The scan report’s Errors column should read 0; anything else is almost always one of the two gotchas above.
07
WordPress hosting
A whole family of independent WordPress installs, each with its own database, reachable at their own path under one domain and one certificate — a landing page with cards, not a folder of subdomains.
The shape of it
ahaddad-wp.duckdns.org/ is a static cards page (its own tiny nginx:alpine container, no database). /my is another static cards page, one level down. /my/mylogbook and /my/mylearning are full, independent WordPress installs — separate containers, separate MariaDB instances, sharing nothing but the domain and the reverse proxy in front of them. New sites, static or WordPress, slot into the same pattern at any depth.
A WordPress install that knows it lives in a subpath
Two things make a normal WordPress container work correctly under /my/<slug> instead of a domain root: telling WordPress its real URL, and telling Apache to serve that path from its normal document root via an alias.
# apache-subpath.conf
Alias /my/<slug> /var/www/html
<Directory /var/www/html>
    AllowOverride All
    Require all granted
</Directory>
# docker-compose.yml
services:
wordpress:
image: wordpress:latest
container_name: wordpress-<slug>
restart: always
environment:
WORDPRESS_DB_HOST: wordpress-<slug>-db
WORDPRESS_DB_NAME: wordpress
WORDPRESS_DB_USER: wordpress
WORDPRESS_DB_PASSWORD: ${WORDPRESS_DB_PASSWORD}
WORDPRESS_CONFIG_EXTRA: |
define('WP_HOME','https://ahaddad-wp.duckdns.org/my/<slug>');
define('WP_SITEURL','https://ahaddad-wp.duckdns.org/my/<slug>');
volumes:
- ./wp-content:/var/www/html/wp-content
- ./apache-subpath.conf:/etc/apache2/conf-enabled/subpath.conf:ro
networks: [internal, nextcloud-aio]
depends_on: [db]
db:
image: mariadb:11
container_name: wordpress-<slug>-db
restart: always
environment:
MYSQL_DATABASE: wordpress
MYSQL_USER: wordpress
MYSQL_PASSWORD: ${WORDPRESS_DB_PASSWORD}
MYSQL_ROOT_PASSWORD: ${MYSQL_ROOT_PASSWORD}
volumes: [./db-data:/var/lib/mysql]
networks: [internal]
networks:
internal:
nextcloud-aio:
external: trueGenerate the two passwords into .env before starting it — never hard-code them into the compose file itself:
openssl rand -base64 24 | tr -d '/+=' | head -c 32 # run twice, once per secretRoute it in NPM
Every site is one Custom Location on the single existing proxy host — not a new proxy host each time. Proxy Hosts → ahaddad-wp.duckdns.org → Edit → Custom Locations → Add location: path /my/<slug>, forward to wordpress-<slug> on port 80.
Gotcha
Nginx resolves upstream hostnames at save time, not lazily — if the target container isn’t already up and running on the shared network, saving fails with a bare “Internal error” and no useful detail in the UI. Always docker compose up -d the new site first, confirm it’s reachable (docker exec npm curl -s -o /dev/null -w '%{http_code}' http://wordpress-<slug>:80/my/<slug>/), then add the NPM location.
If a save ever does stick in that broken state, it’s fixable directly — NPM stores each proxy host’s custom locations as a JSON column, and the on-disk nginx config is just a generated file:
sudo sqlite3 ~/docker/npm/data/database.sqlite \
  "SELECT locations FROM proxy_host WHERE id=<id>;"
# edit the JSON, then write it back:
sudo sqlite3 ~/docker/npm/data/database.sqlite \
  "UPDATE proxy_host SET locations='<corrected json>' WHERE id=<id>;"
docker exec npm nginx -t        # must say "test is successful"
docker exec npm nginx -s reload
Static sites, the lighter version
No database, no Apache alias trick — just a bind-mounted folder behind nginx:
services:
  site:
    image: nginx:alpine
    container_name: wp-<slug>
    restart: always
    volumes: [./html:/usr/share/nginx/html:ro]
    networks: [nextcloud-aio]

networks:
  nextcloud-aio:
    external: true
If it’s built by a static-site generator, set its base/public-path build option to /my/<slug> so its own internal links resolve correctly — the build-time equivalent of WP_HOME.
The landing pages
Plain static HTML, one card per site, no build step — edit and the change is live on next request:
<a class="card" href="/my/<slug>">
  <h2>Display name</h2>
  <p>Short description</p>
</a>
08
Full system map
The same picture as the top, expanded to show every layer that’s actually running — Docker as its own boundary, Portainer managing it, DuckDNS as a real component rather than a footnote. Then the same map again with the exact configuration behind each box.
Layout
ubuntu-serverDocker EngineInternetRouterforwards 80/443 only80/443DuckDNSahaddad · ahaddad-wpresolves toNginx Proxy Mgr:80 / :443 public🔒 :81 adminforwardedPortainermanages this layer🔒 :9443docker.sockNextcloud AIO10 containersexternal-drive datadir🔒 :8080 / :8443Apache 127.0.0.1:1100by domainWordPresslanding + 2 siteseach own MariaDBno public admin portby pathSSH :22 — OS-level, not containerized🔒 tailscale + LAN fallback onlyTailscale deviceslaptop · phone · WSL · …direct to every 🔒 portpublic pathcontrol / DNStailnet-onlyEverything left of the “ubuntu-server” boundary is off-box. DuckDNS isn’t in the traffic path itself — a systemd timer on the server pushes its current public IP to DuckDNS every 5 minutes, and that’s what browsers resolve against before ever reaching the router. Inside the server, everything except SSH runs as a Docker container, and Portainer (also a container) manages that entire layer through the Docker socket rather than through any of the app-level routing.
Every box, labeled
Same map, with the exact address, port, and access method behind each piece.
Edge & DNS — not containers, OS/network level
DuckDNSHostsahaddad.duckdns.org, ahaddad-wp.duckdns.orgResolves to178.153.184.130 (dynamic)Kept current byduckdns.timer, every 5 minScript~/duckdns/duck.sh
RouterWAN178.153.184.130 (dynamic)Forwards80/tcp, 443/tcp → 192.168.100.13Everything elsenot forwarded
SSH🔒 restrictedPort22/tcpAuthkey-only (PasswordAuthentication no)Allowed fromtailscale0 (anywhere) + 192.168.100.0/24Config/etc/ssh/sshd_config.d/10-hardening.conf
Reverse proxy & management
npm🔒 :81Imagejc21/nginx-proxy-manager:latestNetworknextcloud-aio · 172.18.0.12Public0.0.0.0:80, 0.0.0.0:443Admin100.111.255.36:81Host 1ahaddad.duckdns.org → nextcloud-aio-apache:1100Host 2ahaddad-wp.duckdns.org → landing:80, + /my/mylogbook, /my/mylearning
portainer🔒 :9443Imageportainer/portainer-ce:latestNetworkportainer_default · 172.21.0.2Admin100.111.255.36:9443Mounts/var/run/docker.sock (rw) — manages every container on the host
Nextcloud AIO stack — network: nextcloud-aio (172.18.0.0/16)
mastercontainer🔒 :8080/:8443IP172.18.0.2Admin100.111.255.36:8080, :8443Roleowns docker.sock (ro), manages the other 9 AIO containers
apacheIP172.18.0.11Reached by NPMvia docker network, port 1100Host mapping127.0.0.1:1100 (local debug only)
nextcloud (app)IP172.18.0.10Port9000, internal only
database (postgres)IP172.18.0.7Port5432, internal only
redisIP172.18.0.8Port6379, internal only
talkIP172.18.0.4Public0.0.0.0:3478 tcp+udp (TURN/STUN)
imaginary · notify-push · whiteboard · euroofficeIPs172.18.0.9, .5, .6, .3Portsinternal only, no host mapping
data directoryHost path/mnt/nextcloud_dataDeviceexternal drive, ext4, fstab + nofail
WordPress stack
wp-landingImagenginx:alpineIP172.18.0.14 (nextcloud-aio)Serves/ and /my static cards pages
wordpress-mylogbook (+ db)IP172.18.0.13 (nextcloud-aio) + own “internal” netDBwordpress-mylogbook-db, mariadb:11, internal-only netPath/my/mylogbook
wordpress-mylearning (+ db)IP172.18.0.15 (nextcloud-aio) + own “internal” netDBwordpress-mylearning-db, mariadb:11, internal-only netPath/my/mylearning
A
Appendix
Where things live, for whoever’s grepping this at 2am.
| Path | What |
|---|---|
/mnt/nextcloud_data | External drive, all Nextcloud user data |
~/docker/npm/ | Nginx Proxy Manager compose + data + certs |
~/docker/wp-landing/ | Static cards pages (root and each sub-hub) |
~/docker/wp-<slug>/ | One directory per WordPress/static site, fully independent |
~/docker/portainer/ | Portainer compose + data — Docker management UI, Tailscale-only |
~/docker/ADDING-A-SITE.md | Living step-by-step for the next new site |
~/duckdns/duck.sh | Dynamic DNS updater, run by duckdns.timer |
/etc/ssh/sshd_config.d/10-hardening.conf | Key-only SSH override |
Quick health check, any time
docker ps --format "table {{.Names}}\t{{.Status}}"
sudo ufw status verbose
tailscale status
docker exec npm nginx -t
Written from the box’s actual running configuration, not from memory of how it was set up — every command here was cross-checked against what’s live. Placeholders like <slug> and <tailscale-ip> stand in for values specific to your own build.
Portainer
username: admin
Pass: ent-Z1M5
Key: 942103f53d974eac9ad2b3a4647db527ff0be68c0b660e62368ba28244b66341